
Veeam Kasten on Rancher K3s running on WSL 2 , first App : Guide
Intro
I wanted to run a small lab environment on my laptop , i would normally do this contained in a VM on hyper V or Vmware Workstation. Since we can Install Windows Subsystem Linux , i decided why not just use WSL to achieve the same.
What I’ve done is install windows subsystem Linux on
windows & then Install K3s then install Kasten’s , then install a
application called sock shop from Weave Works
Here are the steps , from WSL install to Application install
**NOTE
For WSL i recommend creating a config to limit its usage or you will see VMMEM process use most of your system resources.
See the tail end of this post for config example i used.
WSL:
In PowerShell as administrator run the following :
Enable-WindowsOptionalFeature -Online -FeatureName Microsoft-Windows-Subsystem-Linux
wsl --list --online
wsl --install -d ubuntu-20.04

You will then be prompted with WSL Ubuntu Terminal , finish the installation, and create User & Password

You could also find the terminal through a start menu search

Next Prep Linux for K3s Install
Enable systemd as the init system in WSL to you can get normal behavior
sudo -b unshare --pid --fork --mount-proc /lib/systemd/systemd --system-unit=basic.target
sudo -E nsenter --all -t $(pgrep -xo systemd) runuser -P -l $USER -c "exec $SHELL"
Turn off Nftables and use legacy iptables only ( k3s Doesn’t support NFtables )
sudo update-alternatives --set iptables /usr/sbin/iptables-legacy
Install K3s : Is a lightweight Kubernetes distribution by Rancher labs
sudo curl -sfL https://get.k3s.io | sh -

Confirm its installed by checking the version
k3s --version
Check configuration : you want PASS
k3s check-config
Launch K3s Server ( in the background )
screen -d -m -L -Logfile /var/log/k3s.log k3s server
Next Install Helm
Helm is a software package manager for Kubernetes , we will use helm install our apps , like Kasten
Helm install
sudo curl https://raw.githubusercontent.com/helm/helm/master/scripts/get-helm-3 | bash
Verify install
helm version
Create Kube Config file ( Helm Kasten’s install will look for this )
First we will create a folder .kube
Change directory to home your user
cd /home/” ur user “
Make a directory .kube
sudo mkdir .kube
Change ownership of .kube
sudo chown -R "ur user" /home/ur user/.kube/
generate config file
sudo kubectl config view --raw >~/.kube/config
Next Install Kastens
Add helm repository for Kastens
sudo helm repo add kasten https://charts.kasten.io/
create Kastens namespace
sudo kubectl create ns kasten-io
install Kastens using helm ( generate config file should allow Helm to us that for install , but put Kubeconfig in if it doesn’t )
sudo helm install k10 kasten/k10 --namespace=kasten-io --kubeconfig /etc/rancher/k3s/k3s.yaml
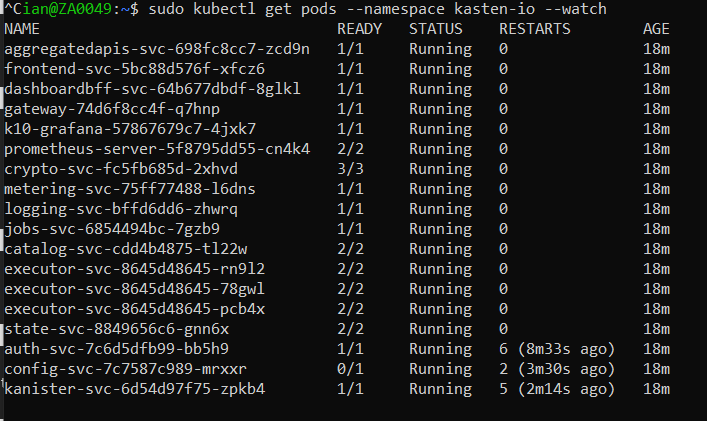
At this point its deploying Kastens we can watch this live
sudo Kubectl get pods --namespace kasten-io --watch
They will slowly start one by one ignore the errors unless
they don’t go away , mine took 18 odd minutes, Again depends on Laptop and resorces available.
When all containers are running and ready 1/1 , 3/3 , you can move on.
To exit watch , press Ctrl + C
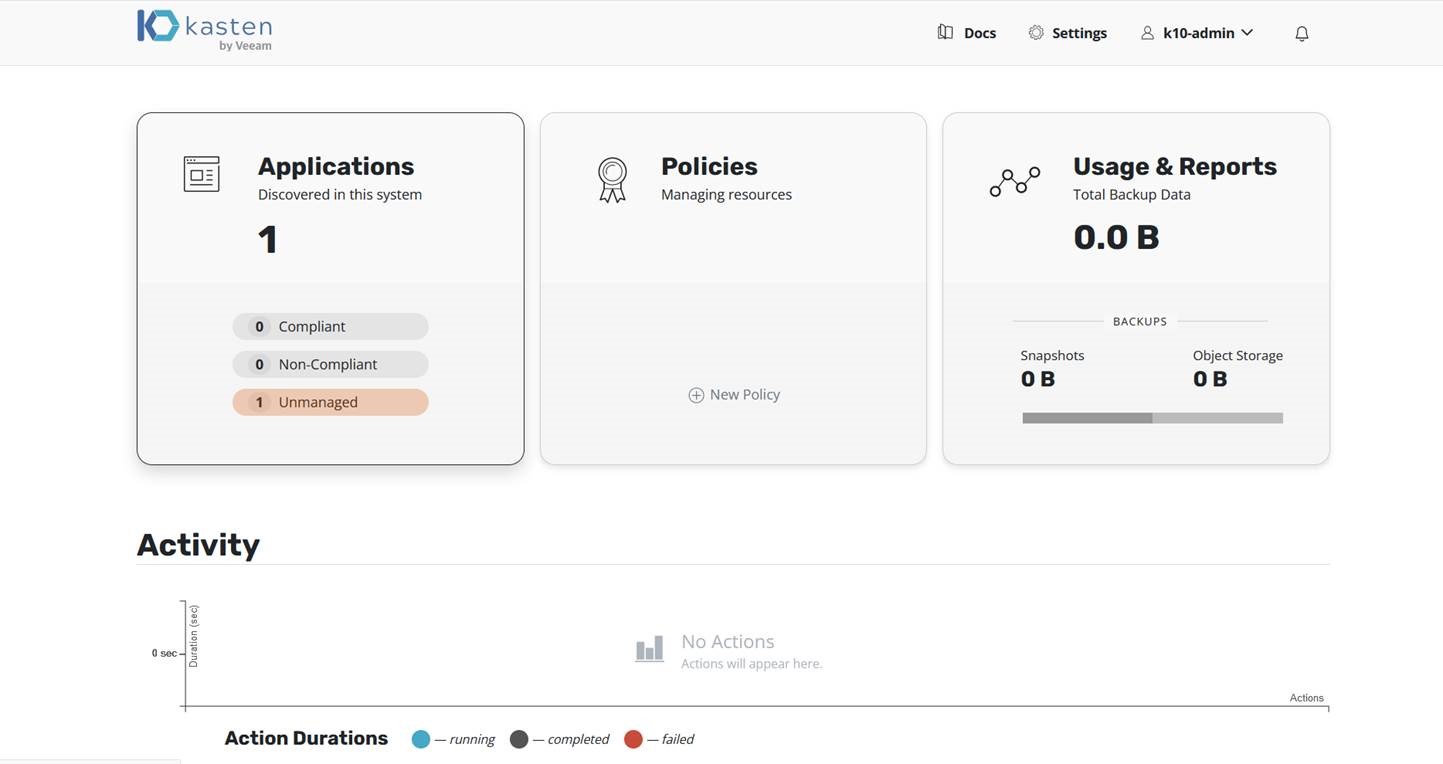
Then we expose the port so we can access the web ui
sudo kubectl --namespace kasten-io port-forward service/gateway 8080:8000 &
Then access this URL to get to K10 Dashboard
http://127.0.0.1:8080/k10/#/dashboard
Next we can install a Application
We will deploy Sock-shop
Sock Shop simulates the user-facing part of an e-commerce website that sells socks
Open a new ubuntu WSL terminal
Run PWD to check you still in your home directory
Use Git to clone the deployment to WSL
sudo git clone https://github.com/microservices-demo/microservices-demo
Create sock shop Namespace
sudo kubectl create namespace sock-shop
Apply the Deployment Yaml
sudo kubectl apply -f microservices-demo/deploy/kubernetes/complete-demo.yaml
Or CD to
microservices-demo/deploy/Kubernetes /
Skip if you ran the one above sudo kubectl apply -f complete-demo.yaml
Watch the containers create like we did with kastens
sudo kubectl get pods --namespace sock-shop --watch
This again took some time to get up

Next we use a describe command to get information about sock shop to get its url & port
Sudo kubectl describe svc front-end -n sock-shop

Its url will be :

From here you can use Kastens to back up the sockshop and recreate it etc…
This does eat alot of resources on your laptop at one point
I was at 99% memory usage, before setting WSL .config.
WSL .Config
So to hard stop WSL to give memory back run this is PowerShell
wsl –shutdown
When wsl is shutdown, you can create a config that will limit its usage
In ur user profile directory C:\Users\User>
Create a .wslconfig file ( make sure to remove the .txt if you use notepad )
In the file paste the following ( modify below as you see fit , for best performance on your Laptop )
[wsl2]
memory=10gb
swap=32
Conclusion :
I used multiple Tools , Software & projects , to have a Lab that i can play round with on my laptop for testing , to read up on each here are the links...
WSL : https://docs.microsoft.com/en-us/windows/wsl/
K3s : https://rancher.com/docs/k3s/latest/en/
Veeam Kastens : https://www.kasten.io/
Sock Shop Demo App : https://go.weave.works/socks
Please comment , Share or give mods.
Comments
Post a Comment
Leave your Thoughts & Comments , and I'll reply as soon as possible.
Thank you for you views in Advance.